Camera
The Camera page allows you to add and manage the camera list in ANSVIS Server, which will be integrated into AI Tasks for analysis.
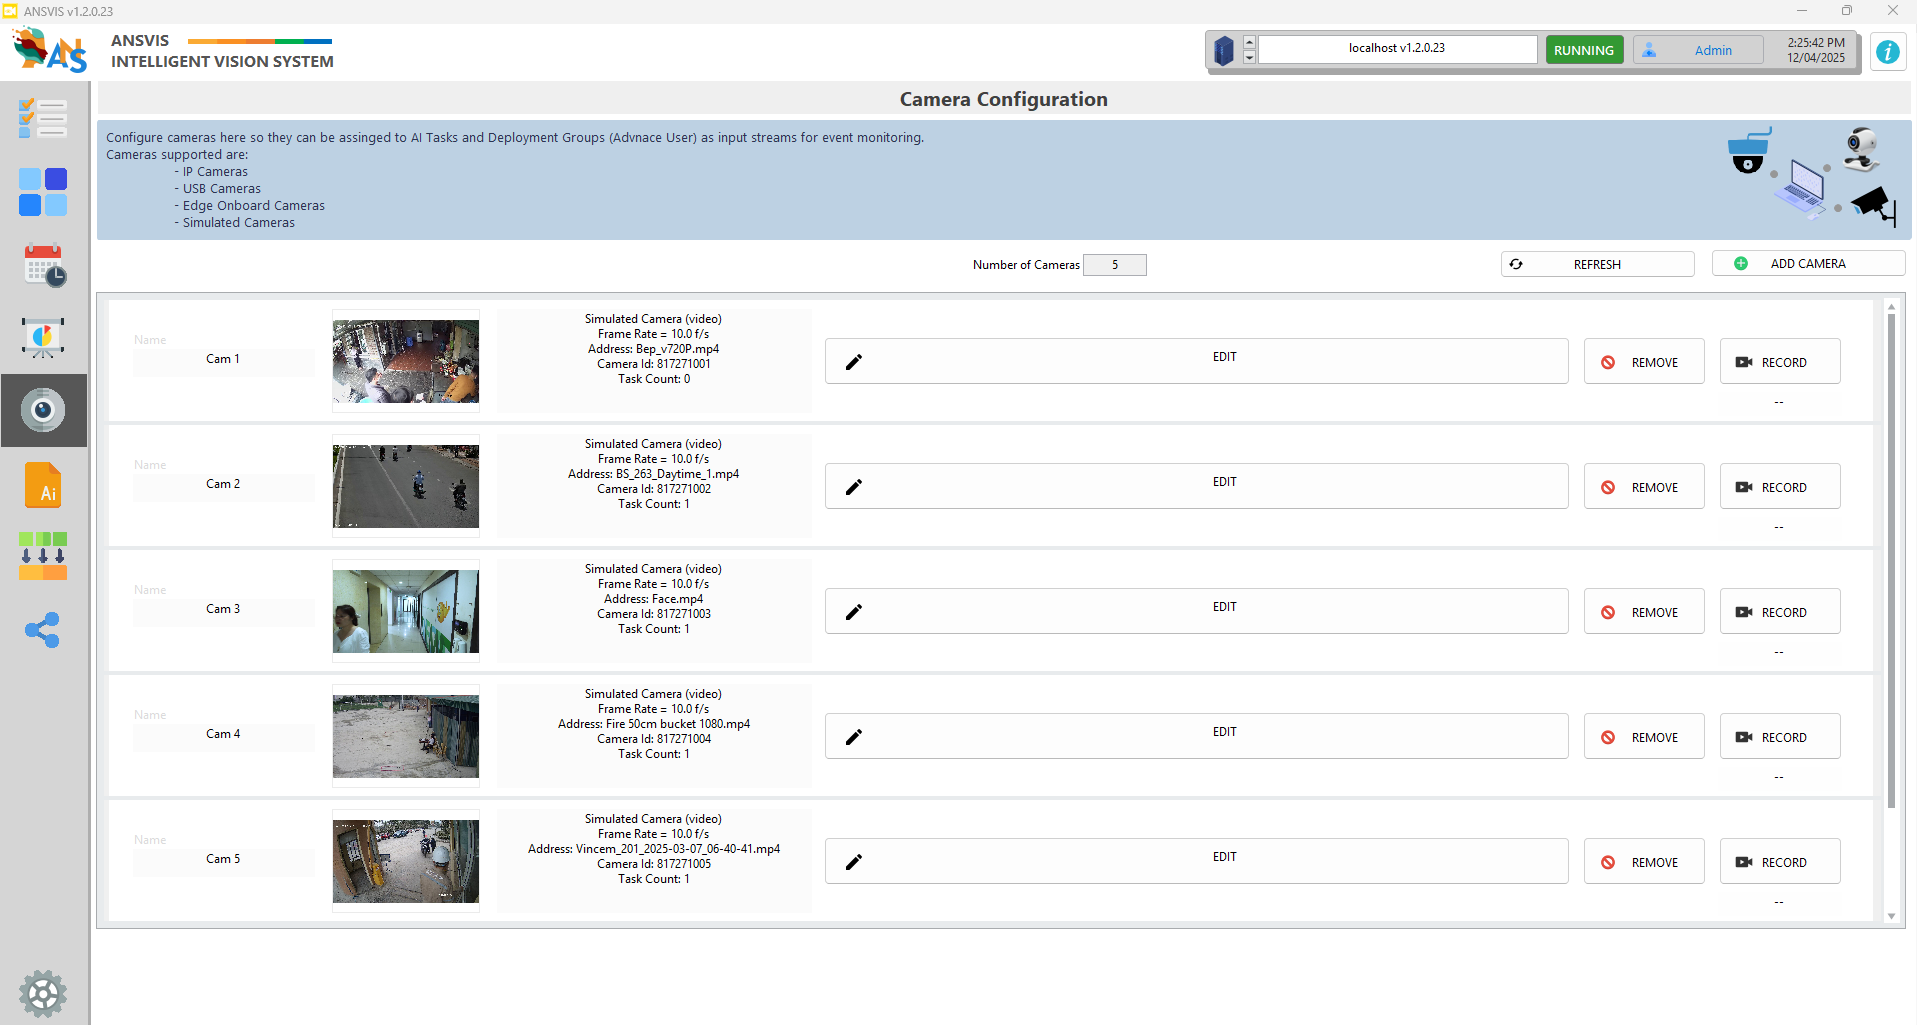
Add new camera
To add a new camera, click the Add Camera button on the top right of the screen, you will be redirect to camera configuration page
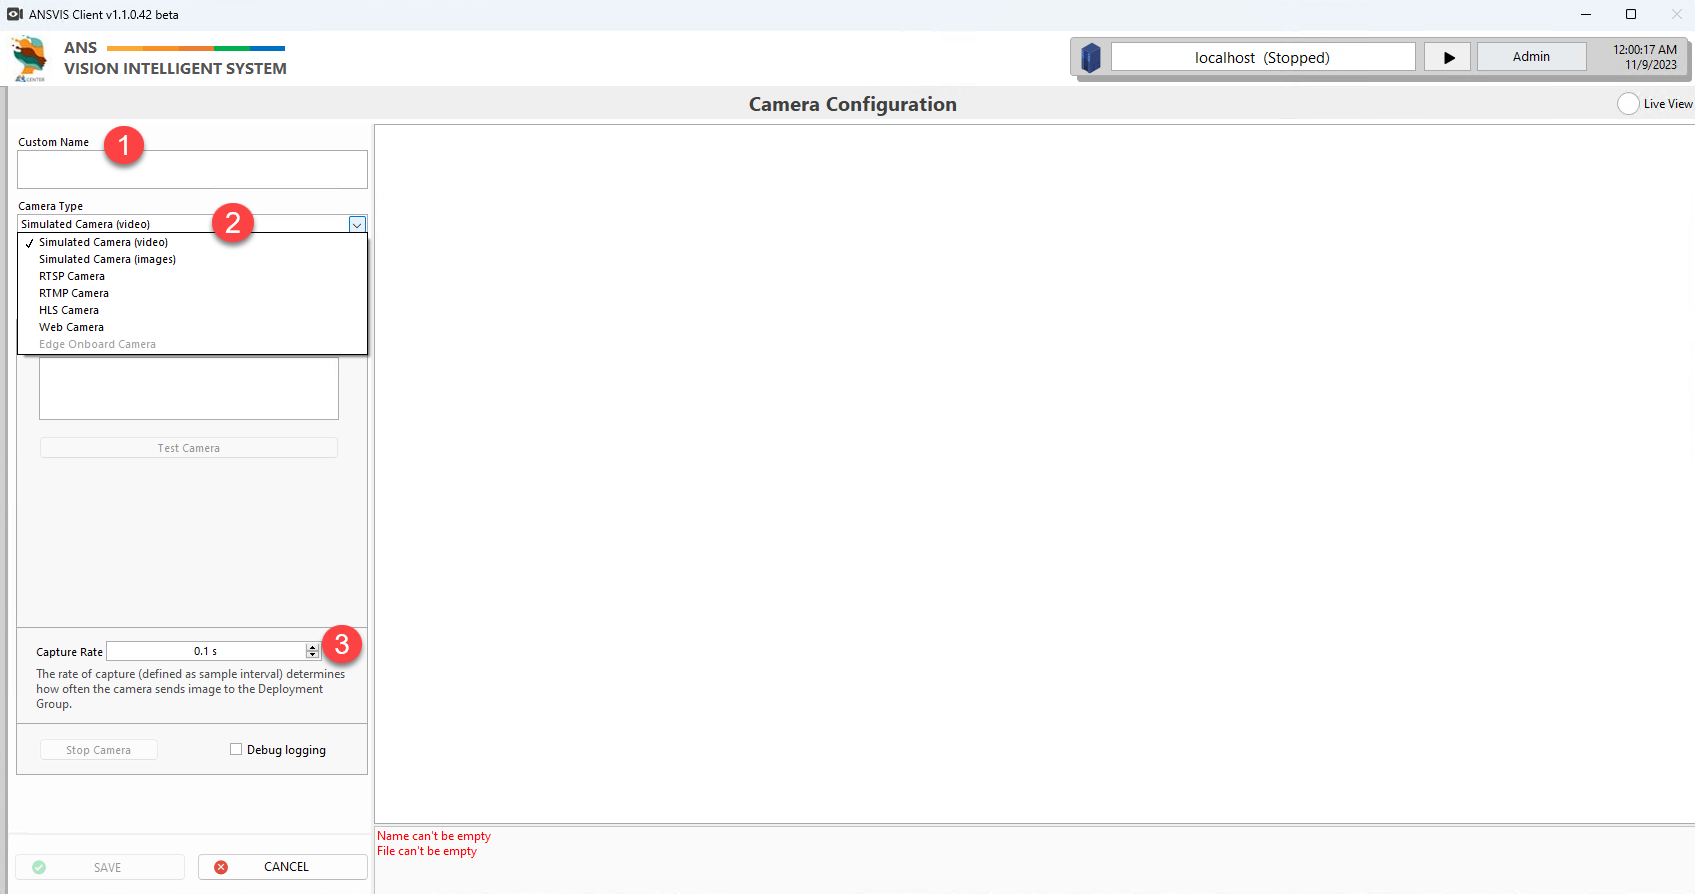
- Enter the camera
Custom Namefor your new camera - Select the camera type from the drop-down list.
- Adjust
Capture Rateto adjust how often the camera send a new image for AI analysis.
Increasing the capture rate means the AI has to process more frames per second, which can slow down the performance. Unless you’re using a high-performance system or your application specifically needs a high frame rate, we recommend keeping the capture rate at its default value (0.1s or 10FPS).
Simulated camera (video)
The simulated camera (video) type only supports mp4 video format.
Simulated cameras allow the use of a video file as a video source. To add a simulated camera to ANSVIS:

- Click
Manage Server Video Files - Browse and upload the video file to server machine
- After uploading to server machine, select the video file from the drop-down list
- Click
Test Camerato see the preview video on the right-side panel (the preview only display 1FPS) - Click
Saveto add the camera to ANSVIS Server
![]()
You can allow the video to run only once if needed to avoid repeated detection. The video will only run again when all related AI Task is stopped first.
Unlike getting image from a real camear stream, ANSVIS need to handle image decoding from the video before sending it for AI analysis, which can slow down the process time. The higher the FPS and video resolution, the slower the process time can get.
Simulated camera (image)
The simulated camera (image) allows you to simulate a video by looping multiple images. Too add a simulated camera to ANSVIS:
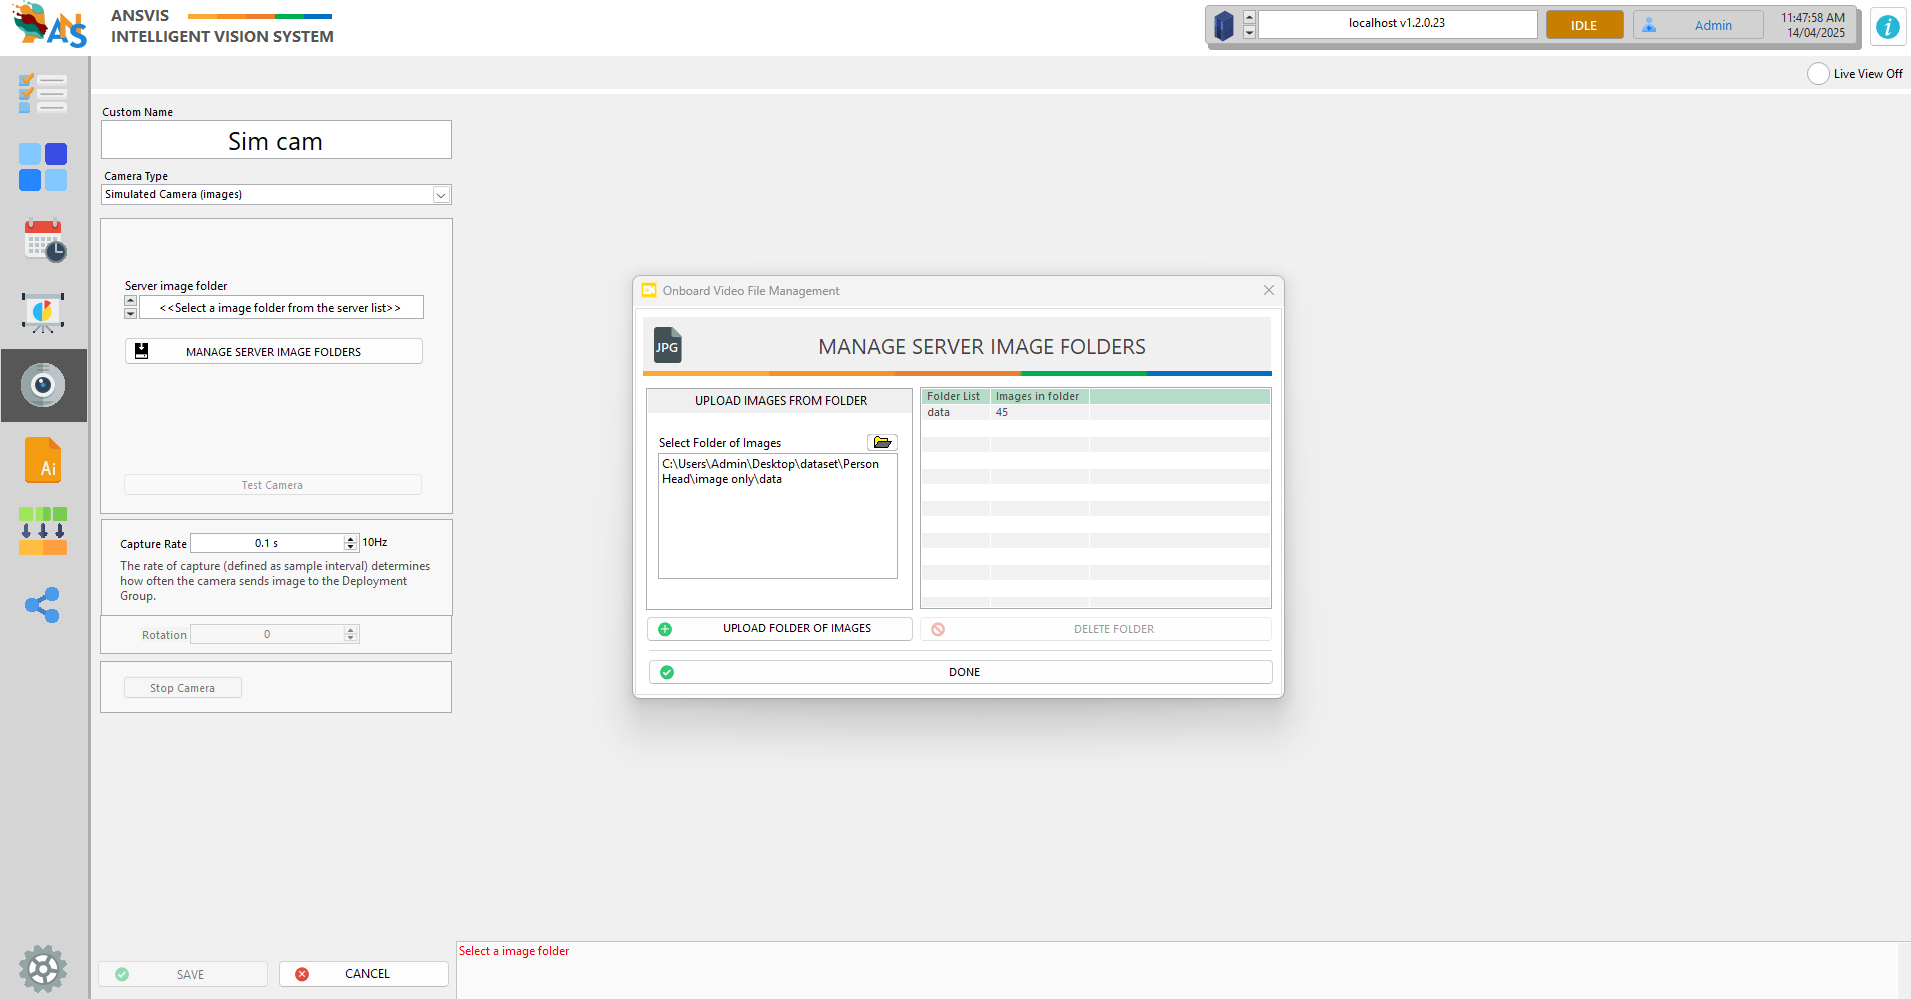
- Click
Manage Server Image Folder - Browse and upload the folder containing only image files to server machine
- After uploading to server machine, select the folder from the drop-down list
- Click
Test Camerato see the preview video on the right-side panel (the preview only display 1FPS) - Click
Saveto add the camera to ANSVIS Server
RTSP Camera
The RTSP Camera Type enables seamless connection to any IP camera that supports the RTSP (Real-Time Streaming Protocol) format.
Connect to camera using ONVIF
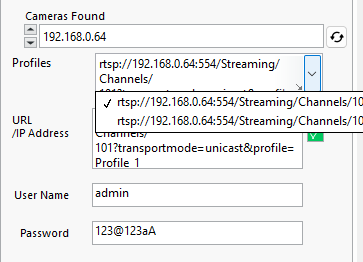
If the camera has ONVIF-enabled and on the same subnet as ANSVIS (e.g., Server IP: 192.168.1.15, Camera IP: 192.168.1.30), follow these steps:
- Scan and Discover : Click the
Refreshicon in ANSVIS to scan the network for camera IP.

- Select Camera : Choose the camera IP from the drop-down list or manually enter the camera IP if not found.

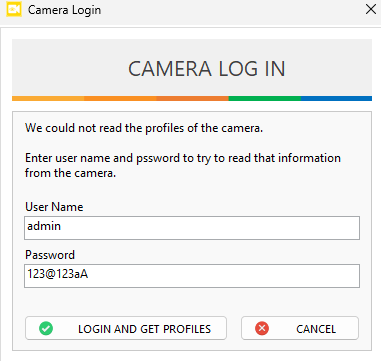
- Authenticate: Enter the ONVIF username and password for the camera (if required).
- Select camera Profile : ANSVIS will automatically populate available RTSP streaming profiles for selection.
Connect to camera using RTSP URL
If the camera supports RTSP Protocol, you can manually add the camera using its RTSP URL

- Enter RTSP URL: Add the camera’s RTSP URL.
Refer to your camera provider’s documentation for the correct URL format
- Authentication (if required): If the submitted URL already includes authentication info, the username and password will auto-populate. Otherwise, you need to provide them manually
⚠️ Avoid using the
:character in usernames or passwords.
Verify Connection in ANSVIS
- Click
Test Camerato see the preview video on the right-side panel (the preview only display 1FPS) - Click
Saveto add the camera to ANSVIS Server
Webcam
The Webcam type allows you to connect to the Server's integrated cameras, such as USB cam, built-in cameras. To add a webcam:
- Scan and Discover: Click the
Refreshicon to scan for webcams. Once the scan is complete, all available webcams will be shown in the drop-down list.

- Select Camera: Choose the webcam from the list.

- Click
Test Camerato see the preview video on the right-side panel (the preview only display 1FPS) - Click
Saveto add the camera to ANSVIS Server