Facial Recognition Service
The Facial Recognition Service enables users to add users, capture face images for face registration, create face groups, adjust face threshold sensitivity, and activate additional face attributes such as gender and emotion for your Facial Recognition tasks.
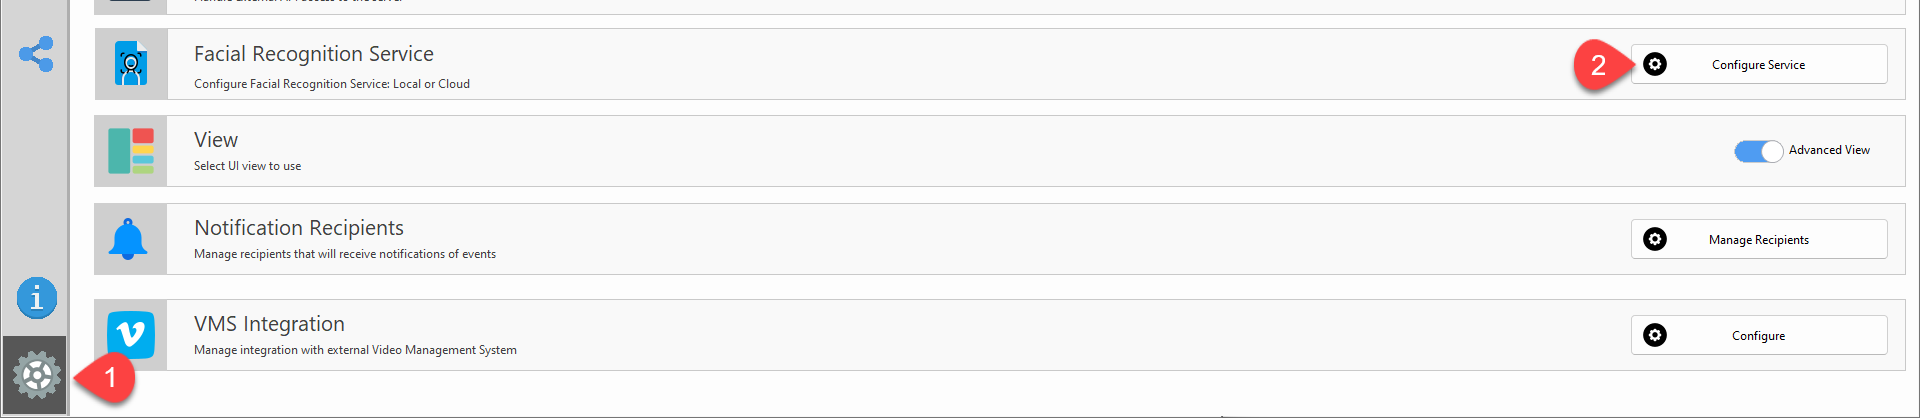
To access the service, go to Facial Recognition Service in the Setting page. You will be prompted to the Facial Recognition Service dialogue
Register new user
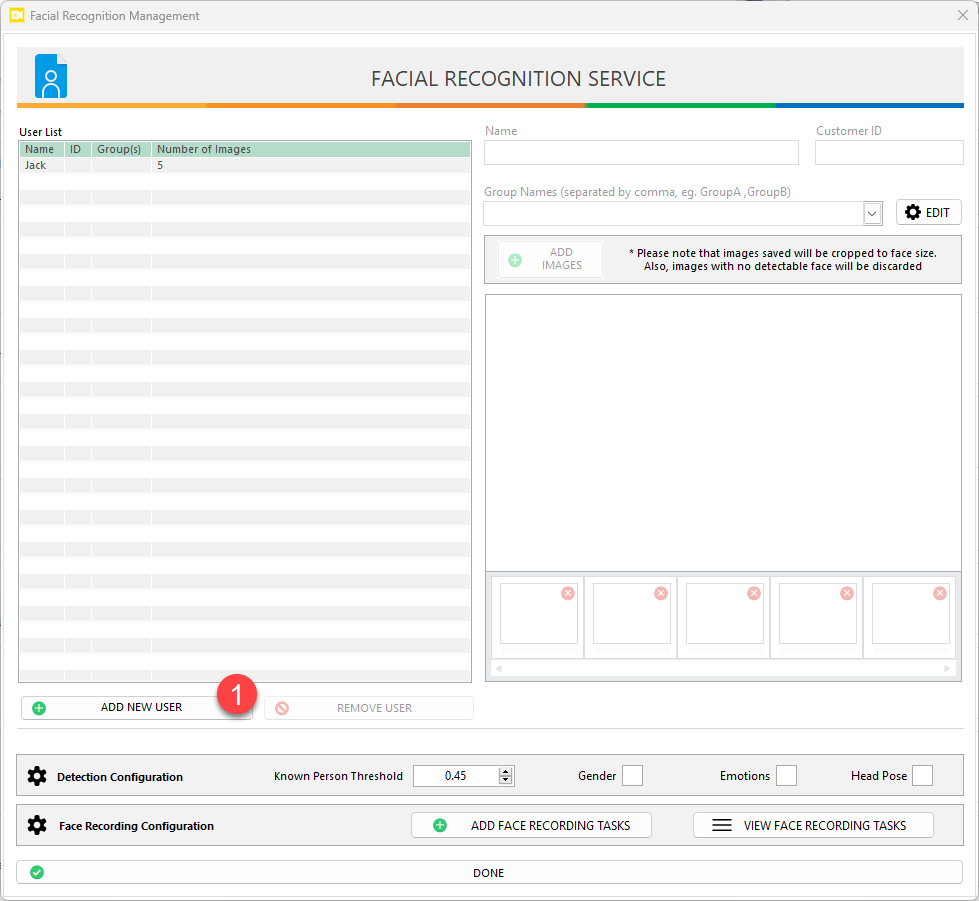
To add a new user, press Add New User
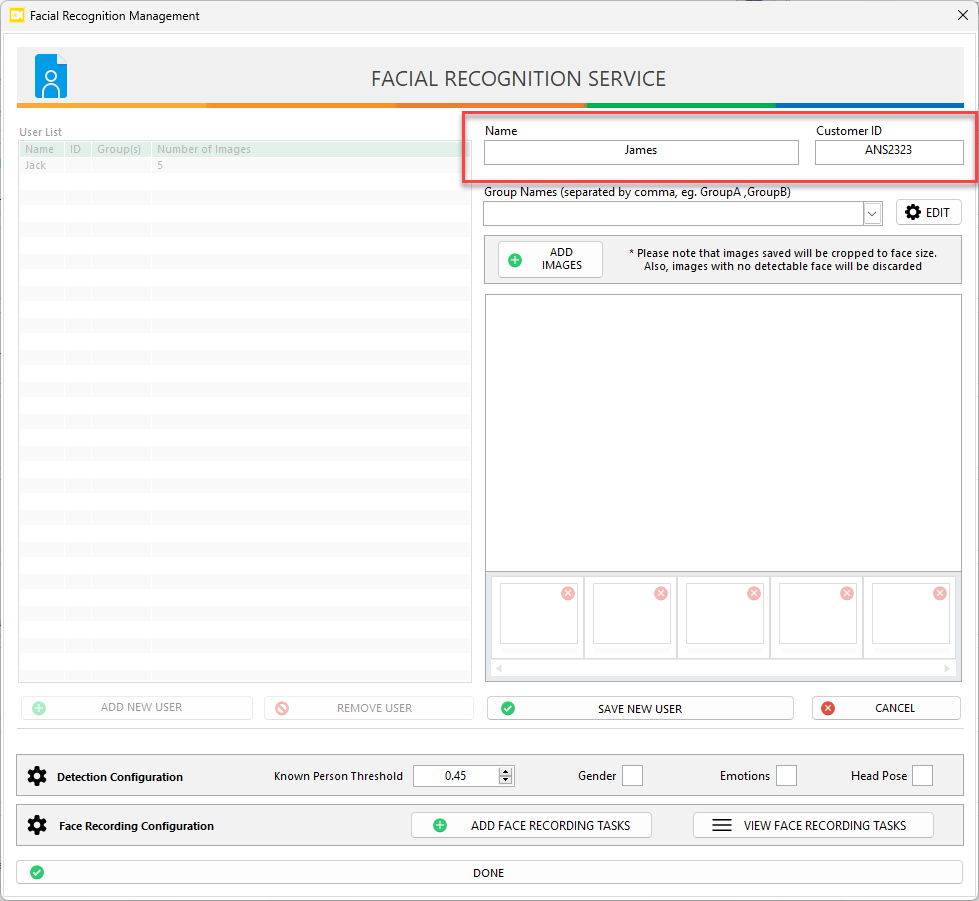
Enter Username and UserID (optional)
Create user group
Assigning an user to a group is optional. However, if the task requires identifying a specific individuals, that person must be assigned to a group. An user can be assigned to multiple groups. These groups will then be displayed as objects for selection within the AI task

From the group name drop-down list, you can assign the user to a group or create a new group by entering the name directly into the dialogue.
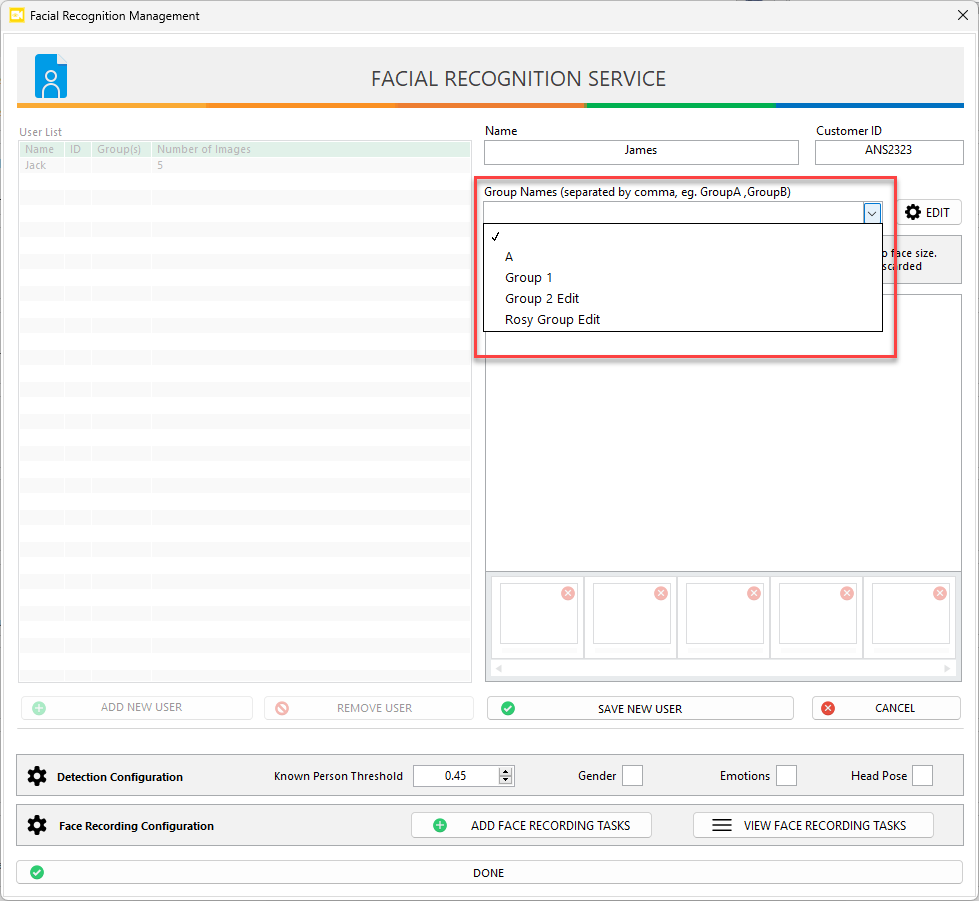
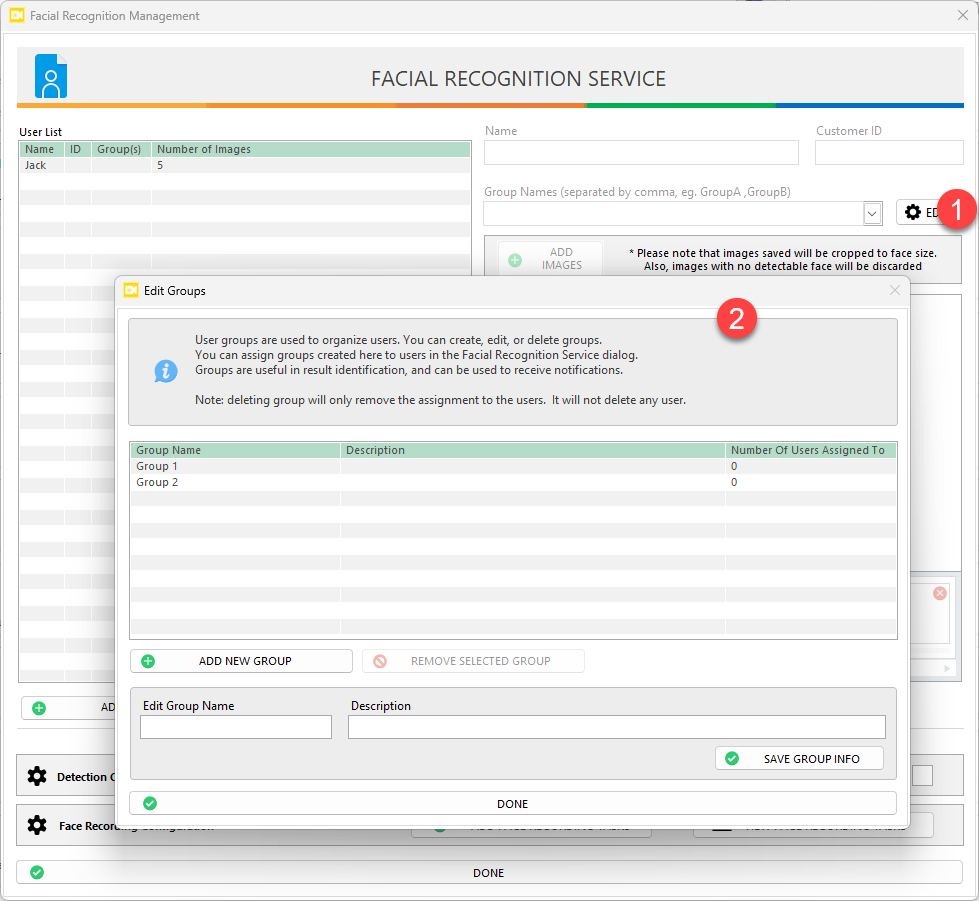
You can also press Edit to create and manage groups
Add face images
There are two ways to add face images for users.
Add face image from local storage
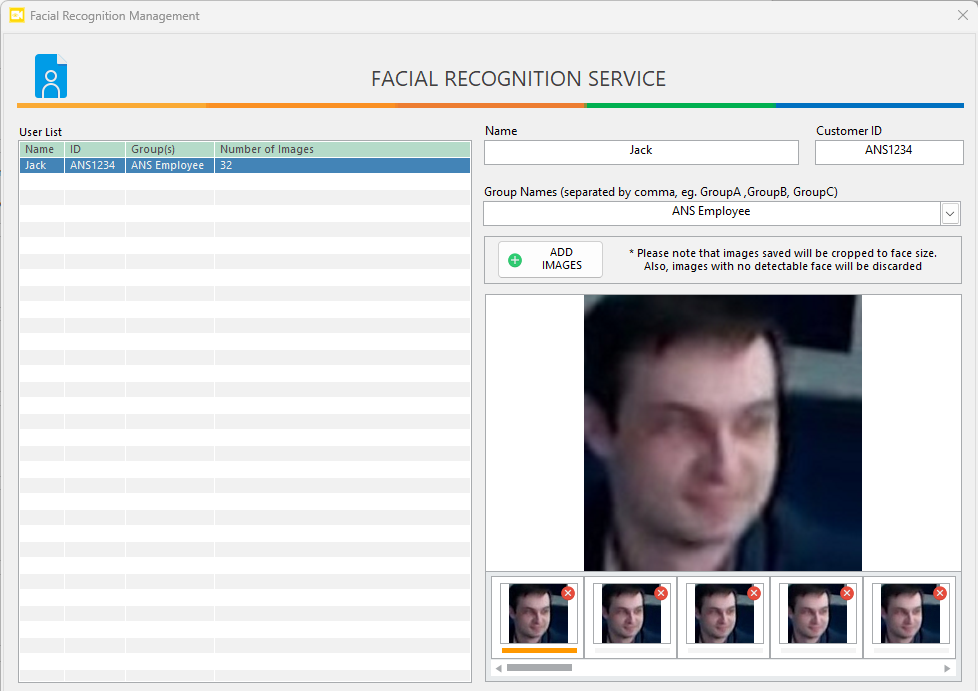
Select the user you want to assign face images to and click Add Images to upload face image from your local drive

ANSVIS will automatically crop the image to face size if detectable.
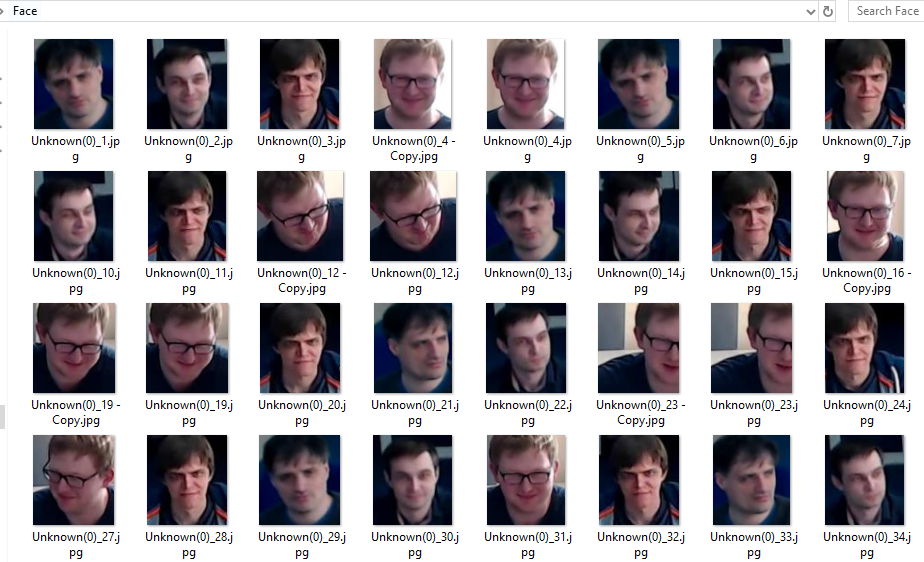
Add face image from face recording task
ANSVIS offers a face-recording function that automatically capture faces images from camera, allowing you to quickly assign these images to any user on your list.

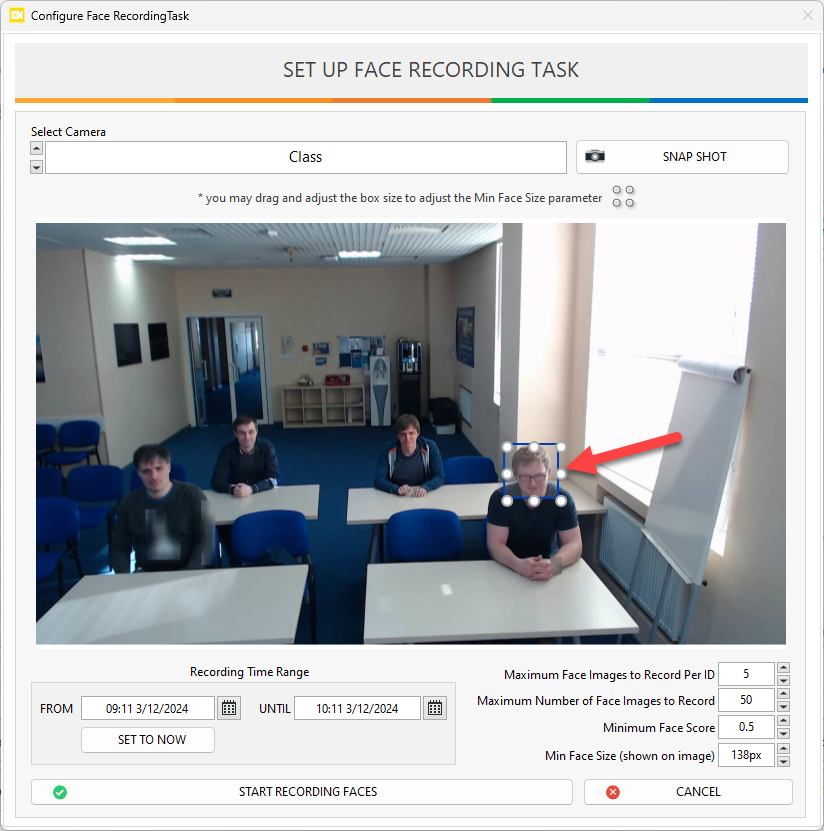
To get started, press Add Face Recording Tasks and you will be prompted to the Face Recording Task Setup page
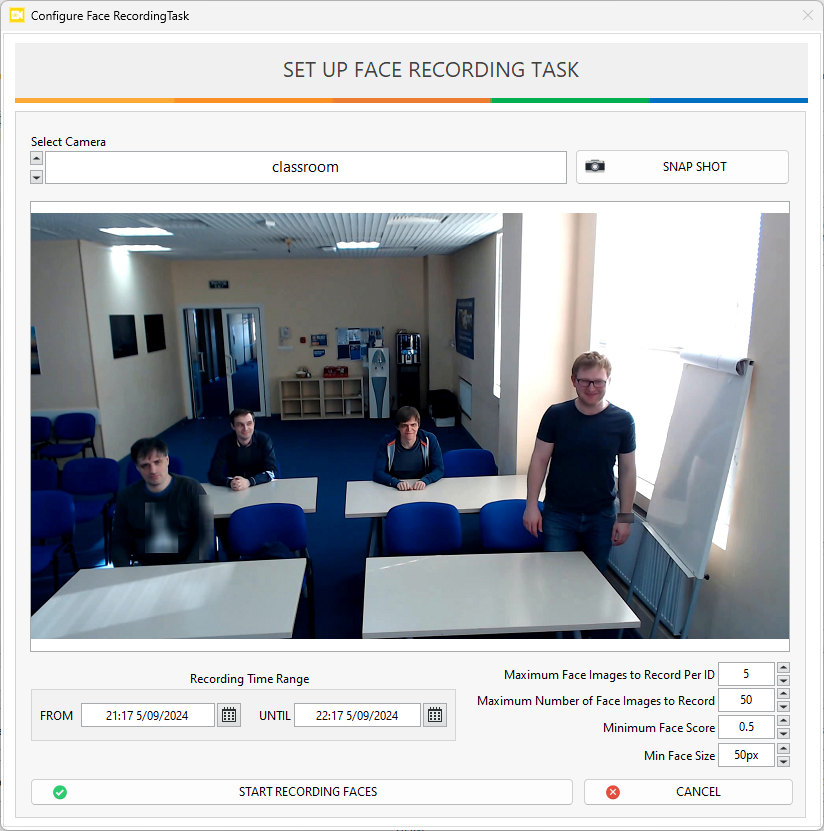
- Select the camera you want to capture faces
Recording time range: you can use this feature to schedule your recording task. Leave empty if you don't want to use this feature.Maximum face images to record per ID: set how many images you want to capture per face IDMaximum number of face images to record: set how many images you want to capture before stoppingMinimum face score: Set the sensitivity for face detection; the lower the face score, the more sensitive it is.Min face size: set the minimum face size to capture in pixel, you can use the rectangle shape in the image to drag and drop the min face size.
Once you have configured all parameters, press Start Recording Faces to start face capturing. You will be redirected to the Face Recording Tasks Status page.

The conditions for the task to stop are either the recording time has elapsed, or the maximum number of face images has been reached. You can also stop the task manually by pressing the Stop button.
Once the recording task is finished, press View Images to access the captured faces
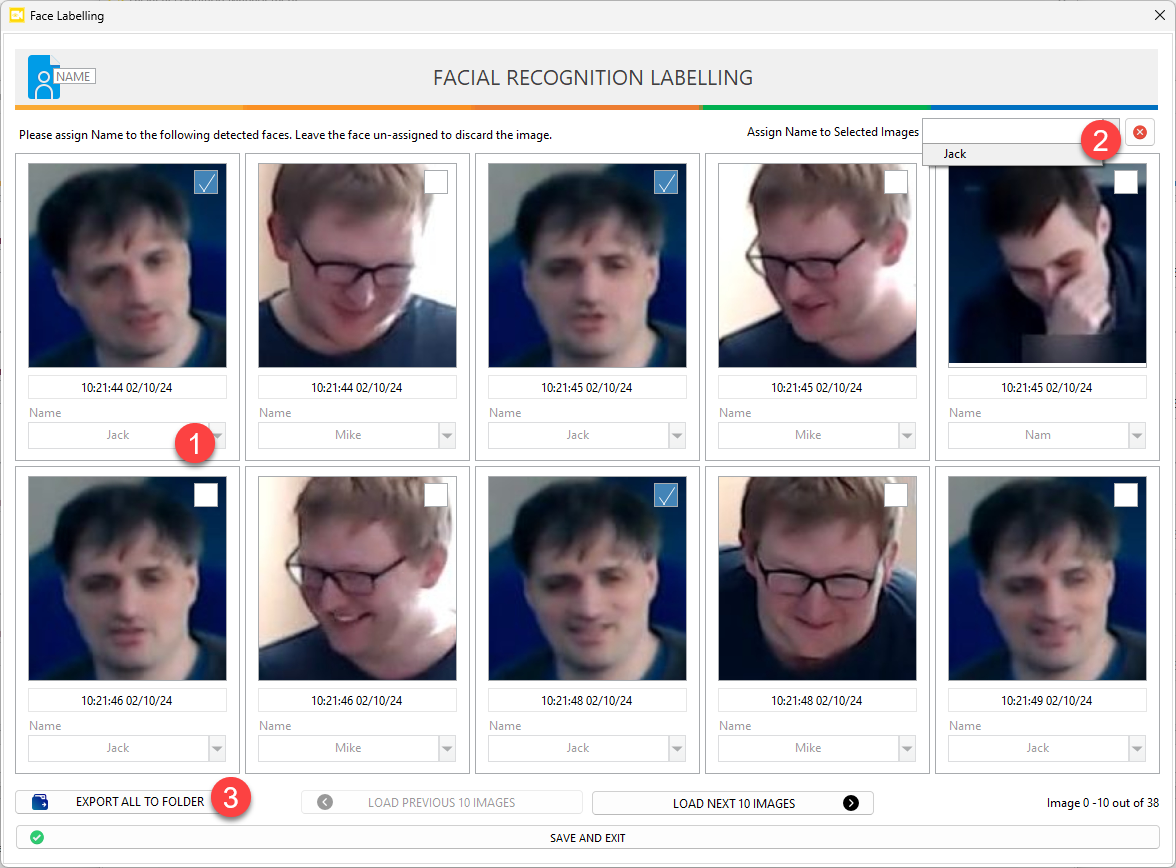
To assign any face to an user:
- Select the image(s) you want to use and use the drop-down name to assign to an user
- If the user hasn't been created yet, you can create a new one by typing directly in the drop-down field.
- Any changes will be saved when you click the
Load Previous,Load Next, orSavebuttons. - Use the
Export All Imagesto export images local storage if you want to manually organize and add them using the local image method
You can always return to the face recording task to assign the remaining images. Pressing Delete Task will remove the recording and its images, but the assigned images will not be affected.
Other features
![]()
Min face size (px)
The Minimum Face Size allows users to define the smallest face dimensions (width and height) for detection. This ensures that the system only add and detects face larger than the specified size, reducing false positives for very small faces.
You can preview the overlay of the min face size by going to a face recording task setting
Known Person Threshold
The known person threshold determines how strictly the system identifies registered faces. It functions as a balance between security and convenience.
- A higher threshold means the system is more confident with fewer face samples but increases the chance of false positives.
- A lower threshold reduces errors but requires more face images for accurate recognition.
This setting allows you to fine-tune the system based on your desired balance between speed, accuracy, and risk tolerance.
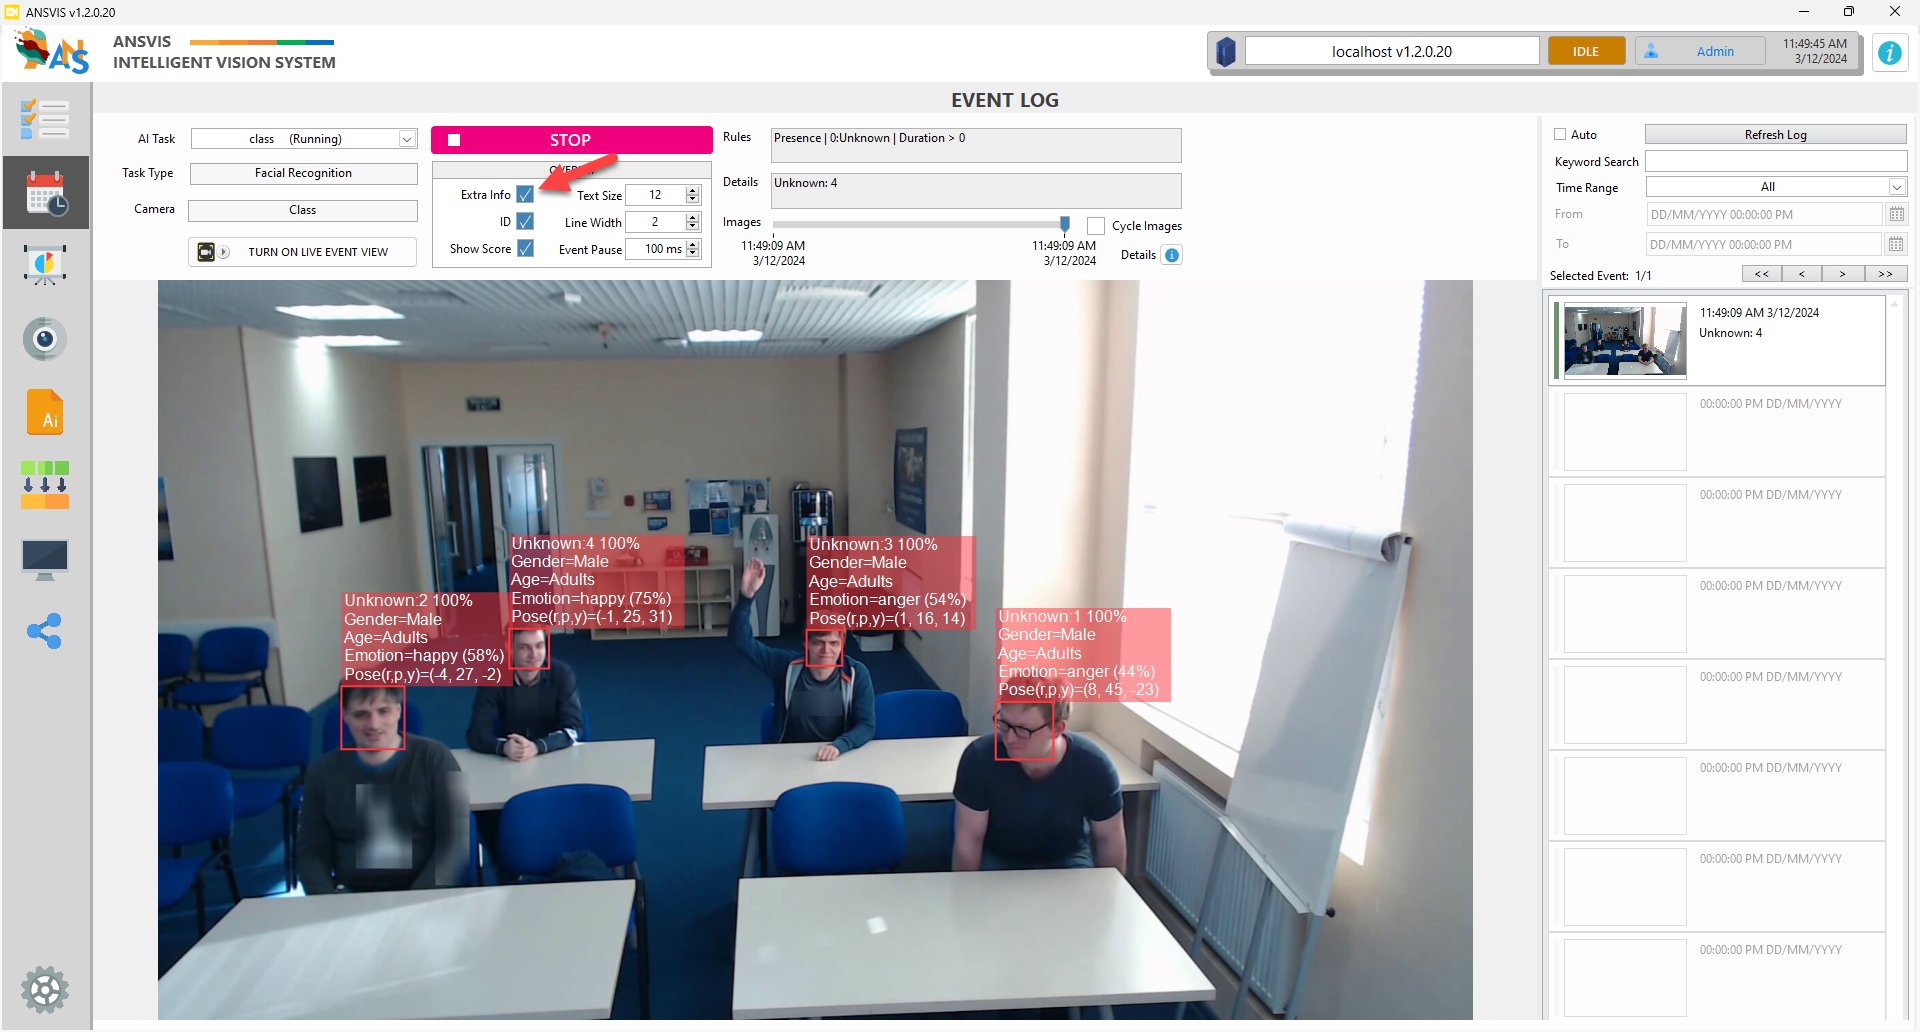
Face Attributes
You can enable gender, emotions, and head pose options to provide extra information on detected faces.
To see this information in the event view, check the Extra Info box in Event Log
Export face events
You can collect face images from the event log for face registration. To do this:
- Go to the
Event Logpage of a Facial Recognition AI Task - Right-click on the event list
- Select
Export All Face Images
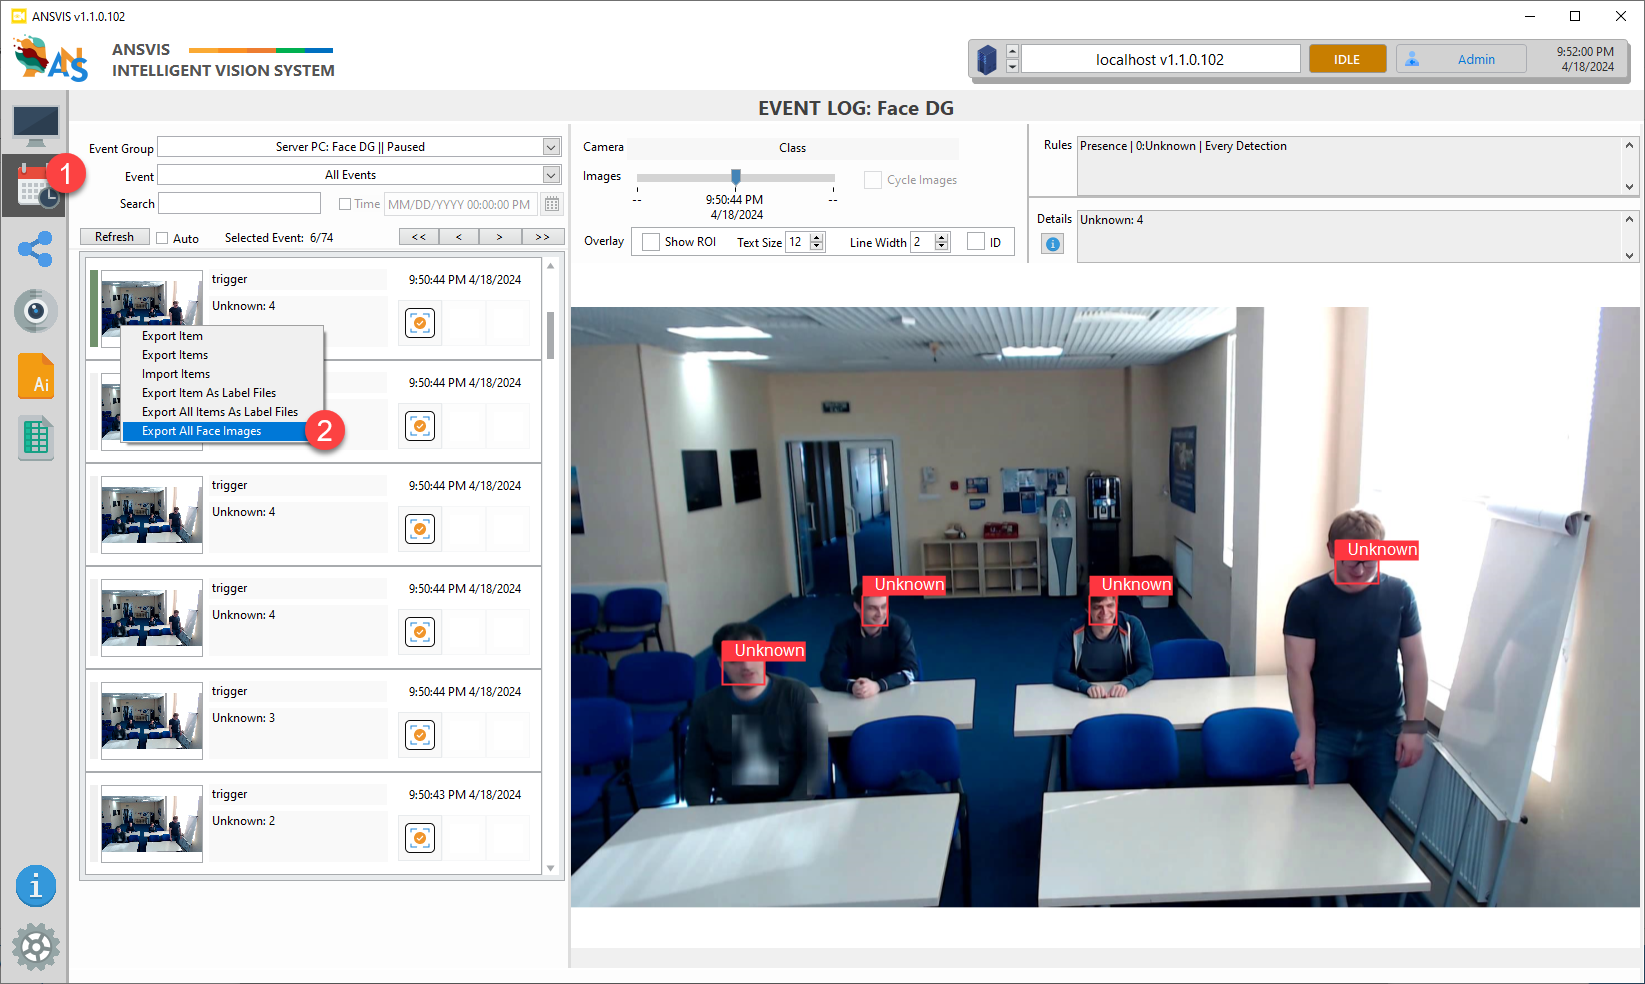
ANSVIS will automatically crops exported images to isolate the face area, removing unnecessary background. This simplifies face registration, allowing you to quickly re-import the cropped images into the facial recognition database if needed.