ANS Labelling Tool
The ANS Labelling Tool is built inside ANSTS, but you can download a standalone version of it (without licensing required) from our Portal, located in Product> Other Tools> ANS Labelling Tool
ANS Core Engine are still required for standalone ANS Labelling Tool installation
Introduction
ANS Labeling Tool allows you to:
- Add, modify, and delete labels of your dataset in this format.
- Convert label files from other formats (YOLO, Pascal VOC, COCO) to ANSTS format so you can reuse your original label information.
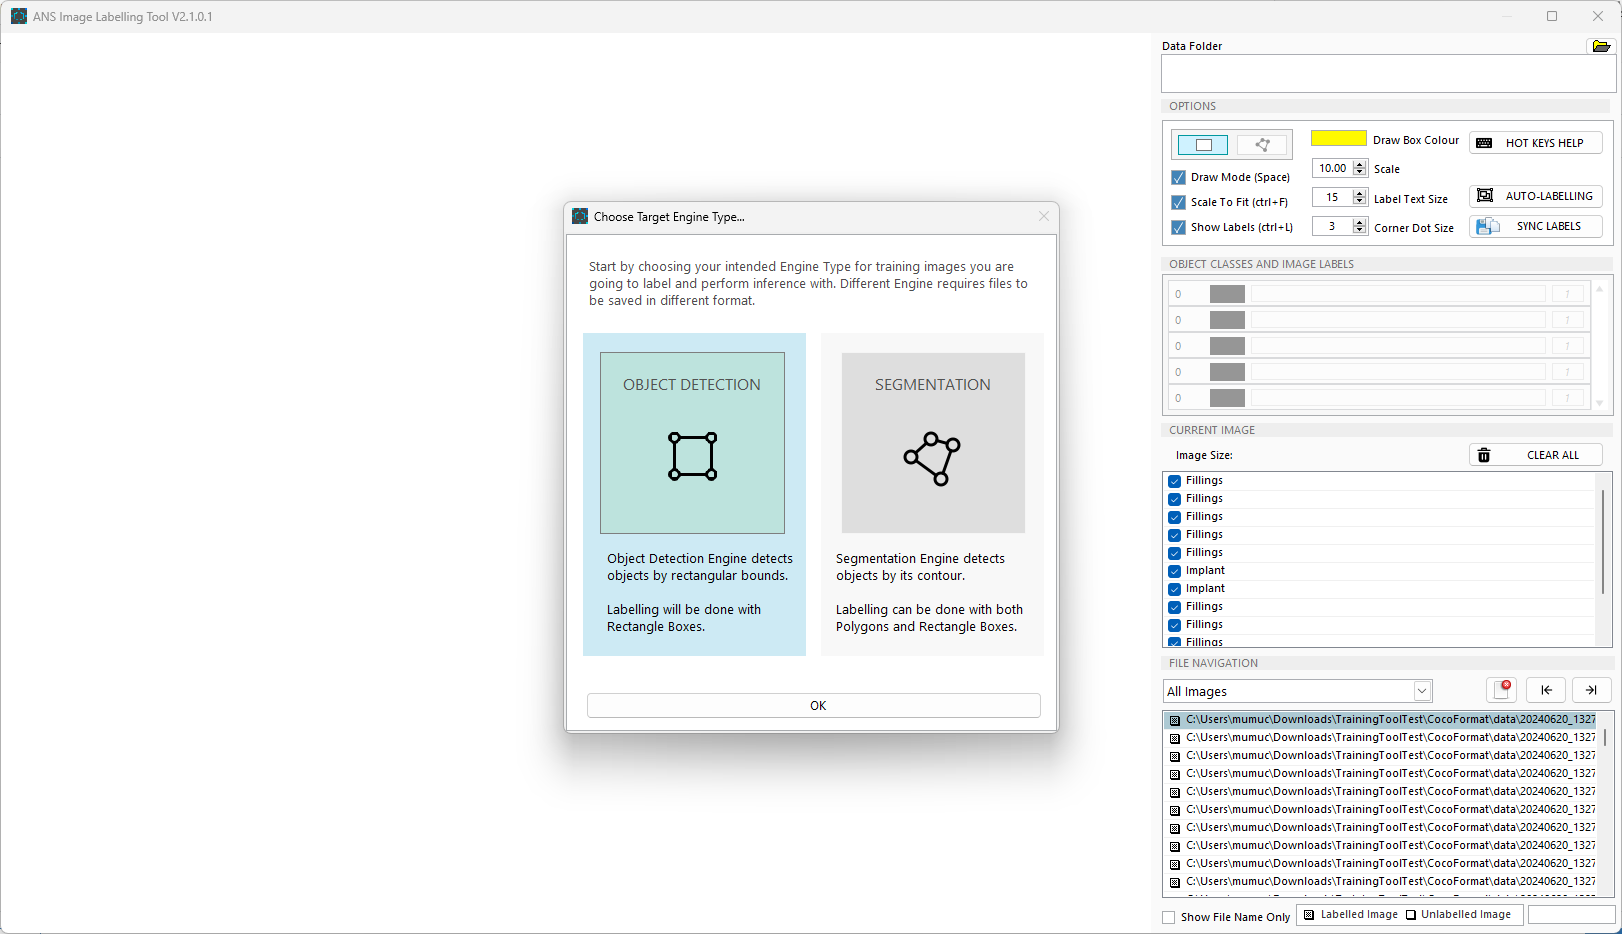
Launch ANS Labelling Tool
Launching the tool will prompt you to select your Engine Type. For this project, please choose Object Detection and press OK.
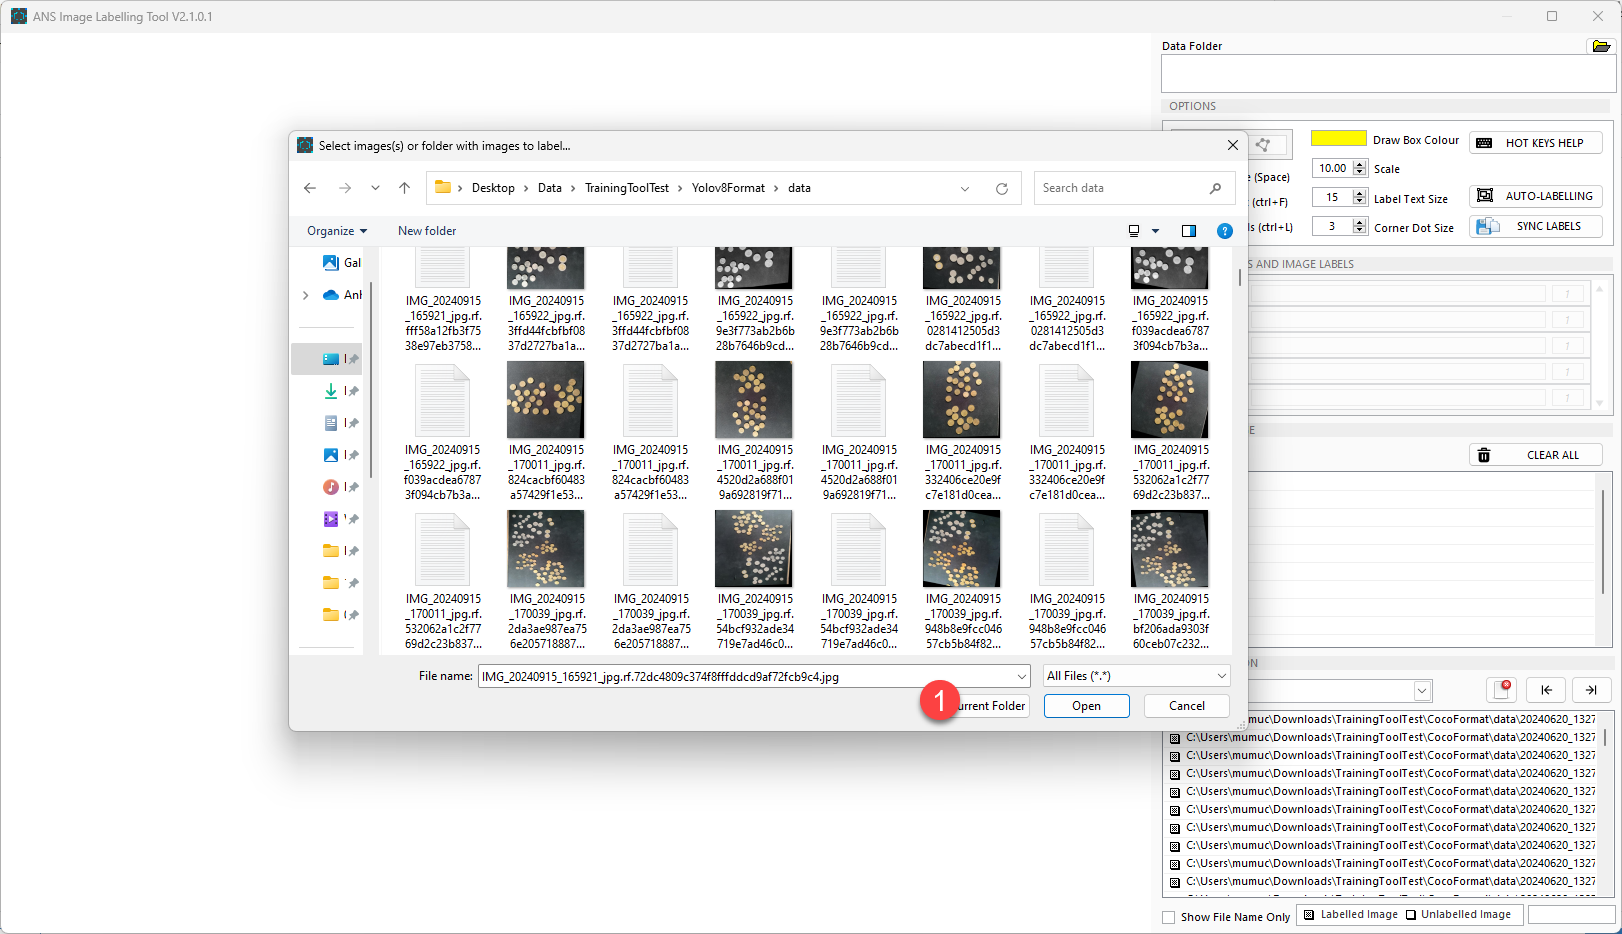
Import Dataset
Browse to your dataset folder and press Current Folder to load the dataset.
The Import Data dialogue will be displayed.
If your dataset does not have label files, select No and press OK to begin your labeling process.
If your dataset has label files, select Yes and choose the label format you have to import.
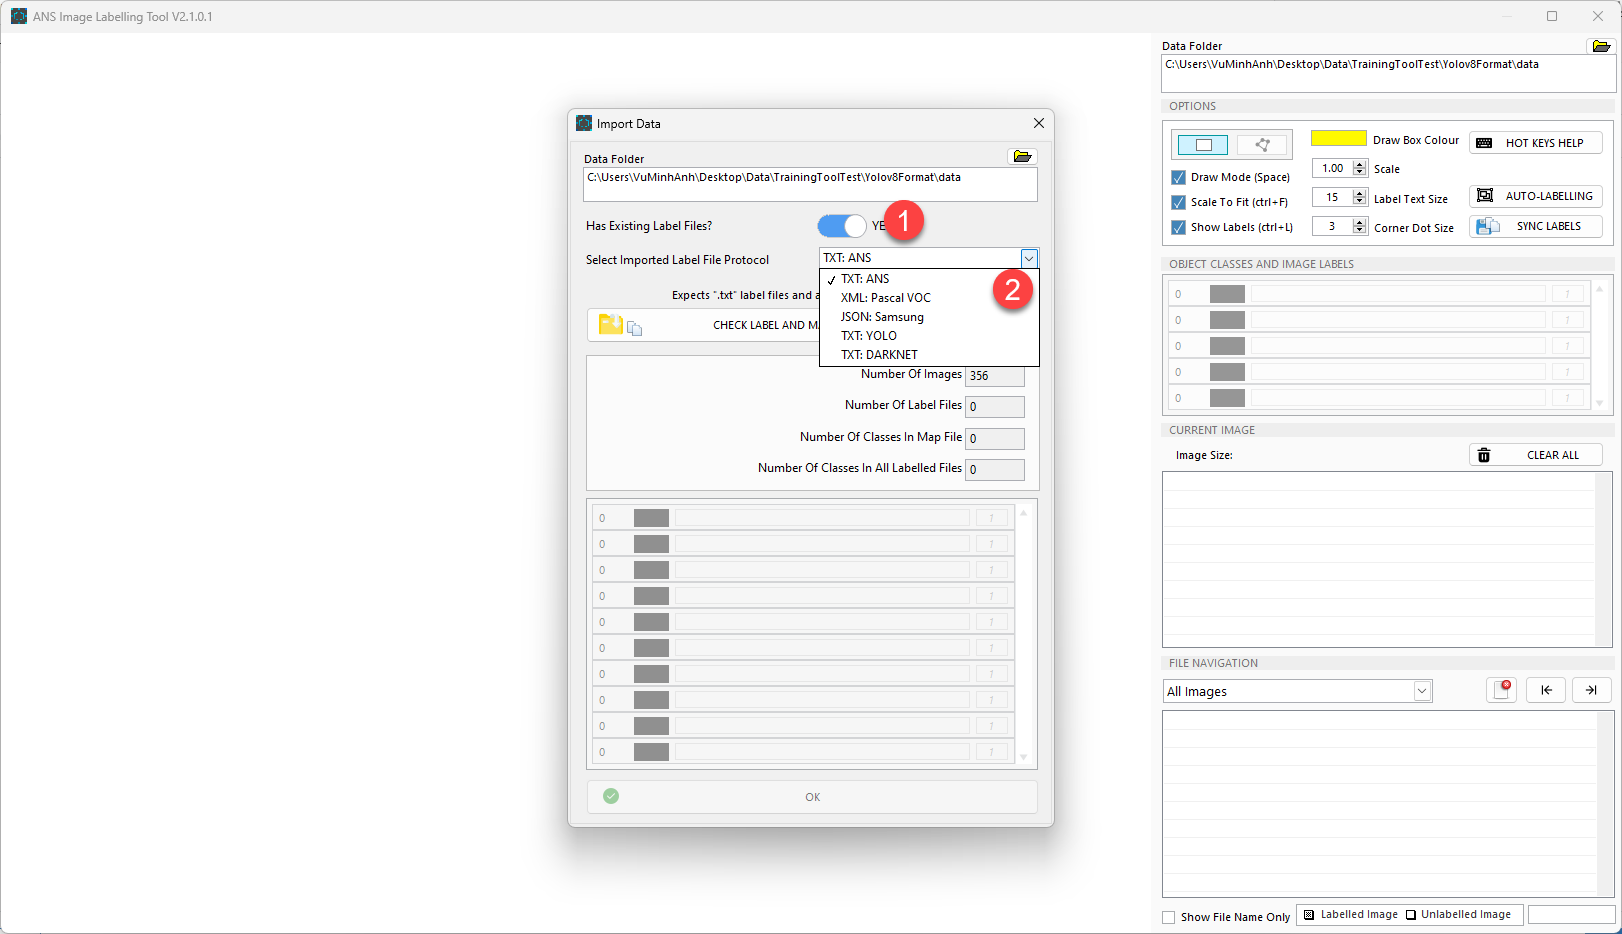
Press Check Label and Map File Information
-
If the system can locate your label files and map files, all label information will be displayed in the dialog box. Press
OKto begin generating files in ANSTS format.
 info
infoIf your dataset is fully labelled, you can skip the following steps or continue to make adjustments.
-
If the map file is missing, the system cannot identify the object class and will ask to generate the ANS_Class.json format. Once the map file is generated, the object class name will be labeled as "unlabeled class." Press
OKto start generating files in ANS format, and then you can continue to name your object class.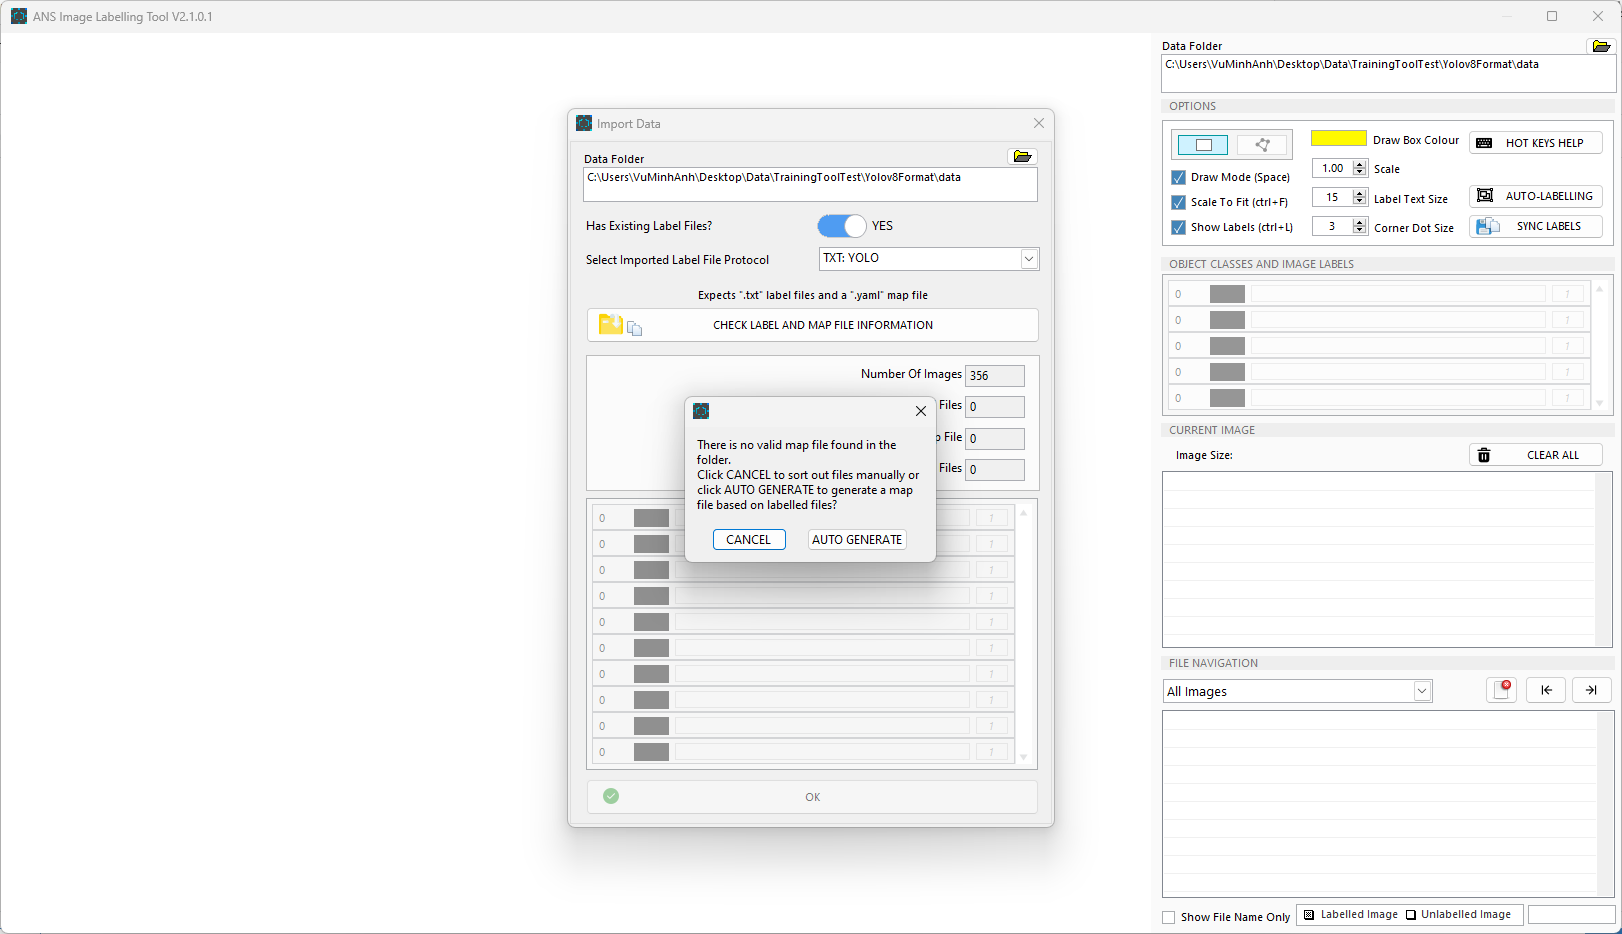

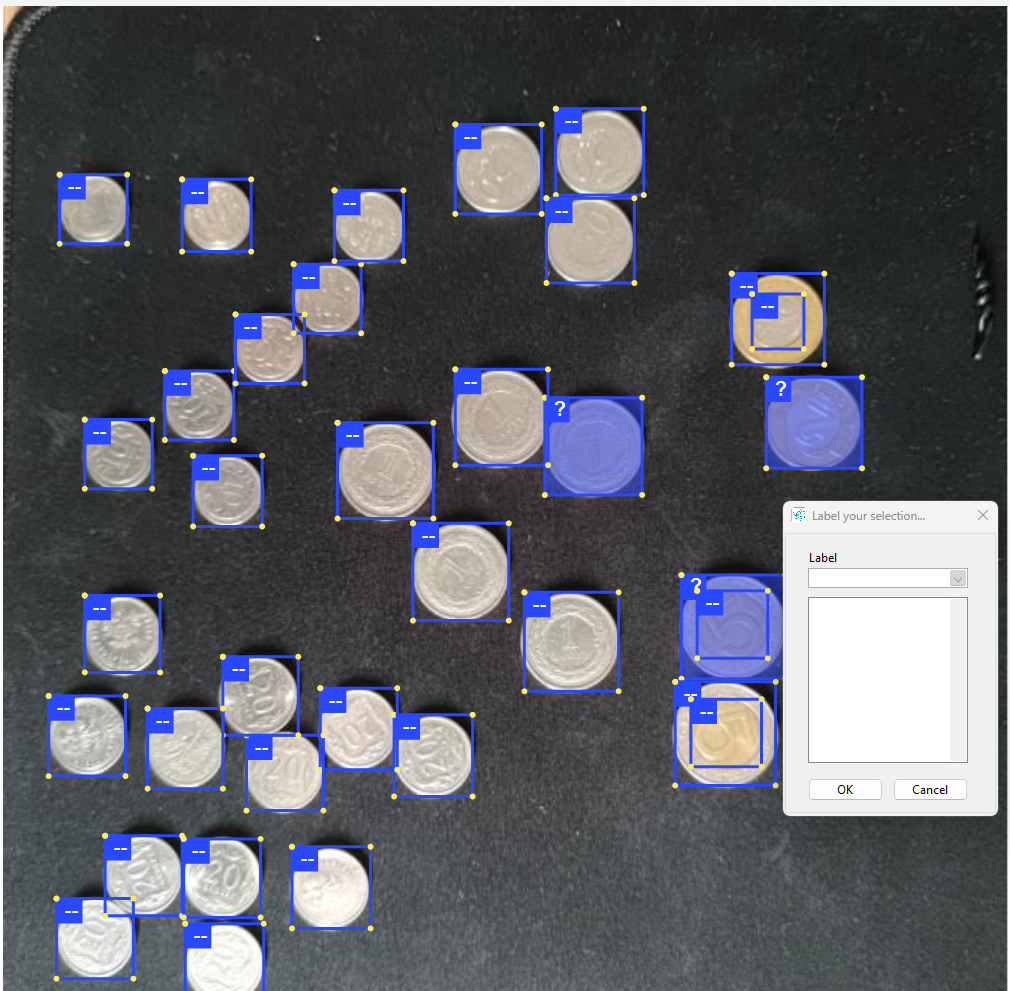
Label Image
To label an object from an image:
- Drag and drop the cursor around the object of interest
- Enter a new object class name or select the object from the drop-down list (if any)
Options
The Options menu allows you to:
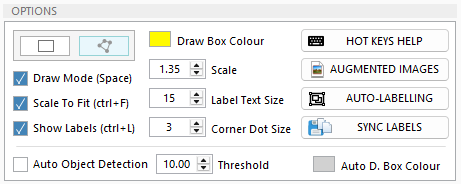
- Draw mode: enable to change the cursor into drag and drop state; disable to change the cursor into bounding box selection state
- Scale to fit: Auto-rescale image to fit screen size
- Show labels: show the label text next to its bounding boxes
- Draw box color: change the color of the draw box
- Scale: Adjust image size
- Label text size: adjust label text size
- Corner dot size: adjust the bounding box's line width
Auto-Labelling
The Auto-Labelling function allows you to automatically label all images by doing AI inferencing with a trained ANSTS model.
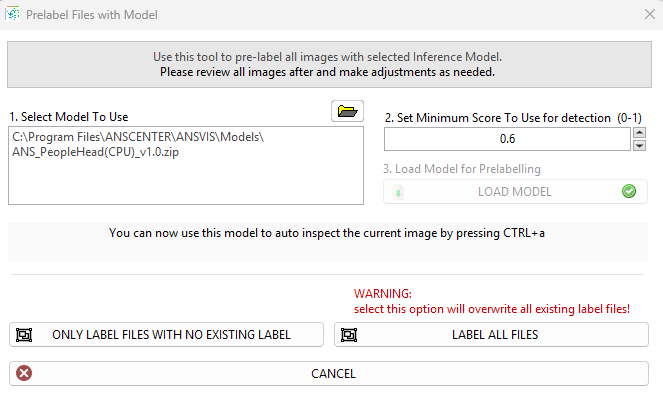
To start the auto-labeling process:
- Browse to your ANSTS trained model
- Click
Load Modelto begin uploading and optimizing the model - Set
minimum scorefor detection - You can either click
Only label files with no existing labelorLabel all filesto start auto-labelling
GPU model can only be used in NVIDIA GPU machine and will take longer time to complete optimizing than CPU model
Once completed, the process will automatically populate the corresponding object classes and bounding boxes across your dataset. You should review all images to ensure all labeled objects are correct and make modifications if necessary.
Auto Object Detection
The auto object detection is a powerful function that can automatically highlight objects in the image by drawing bounding boxes around them, saving you time and effort on manual bounding box creation.
After check the Auto Object Detection option, it will automatically populate bounding boxes around detected object. Now, all you need to do is select a bounding box or hold Ctrl to select multiple bounding boxes, and then assign them an object class name.
Sync Labels
Pressing the Sync Labels button will copy all labels (including class name, size, location) from the current image and paste them into the rest of the training dataset.
Noted that this will overwrite all current labels of the training dataset as well.
Images Augmentation
The Images Augmentation is a technique used to artificially expand the size and diversity of a dataset by applying various transformations to existing images. This process helps improve the generalization ability and robustness of machine learning models.
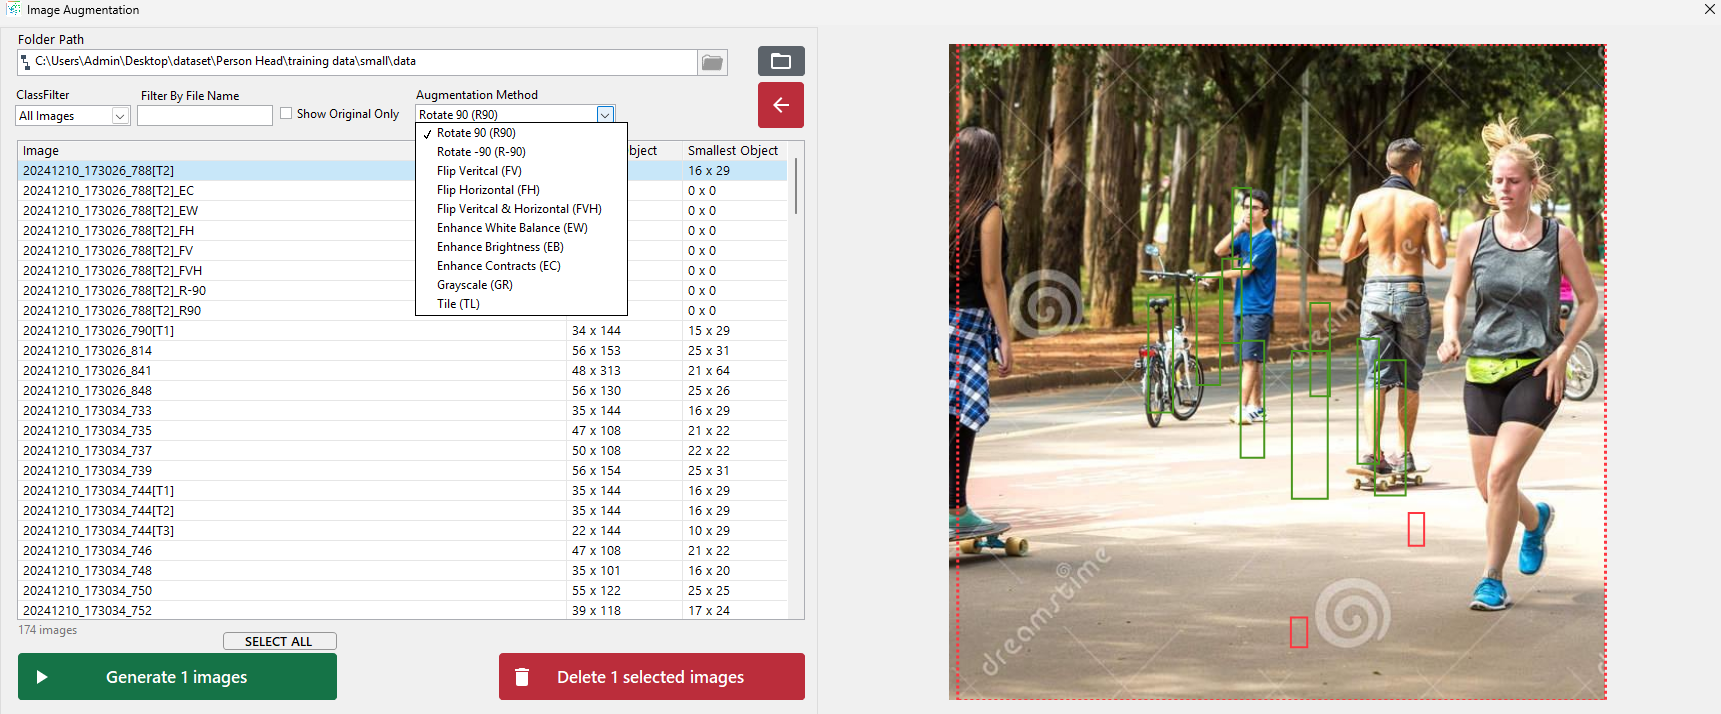
ANSTS provides different augmentation methods, such as: Rotate, Flip, Enhance Color, Grayscale or Tile images
The Tile or Slicing-Aided Hyper Inference (SAHI) technique divides or "slices" the image into smaller, focused sections centered around labeled objects. This technique enhances training by analyzing detailed segments rather than processing the whole image at once. The result is not only faster training times but also increased accuracy, as the model can focus more precisely on the object details in each slice.
Object Classes and Image Labels
This function allows you to manage all object classes from the training dataset.

- Bounding box color: Change the bounding box's color for each class by clicking on the color box
- Rename object class: Change the object class by typing directly on its name box. You can also combine classes by renaming it to the class you wish to merge with.
- By pressing
Right-click, you can:- Delete an object class
- Add a new object class
- Reorder the object classes, this will allow you to switch object ID between classes
Current Image Label Info
Each item in this dialog reflected to a bounding box in the selected image

-
The
checkboxallows you to show/hide selected items from the image -
Double-clickingor pressEnteron an item to change its name -
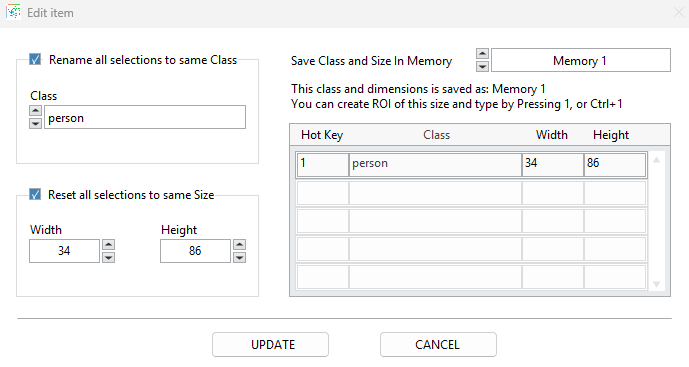
By pressing
right-clickon an item or multiple items, an advanced editing dialog will display, you can:- Rename the selected item(s)
- Update the bounding box size of selected item(s)
- When both the
renameandreset sizefunctions are enabled, you can select amemoryslot to save the setting as a hotkey for the labelling process
File Navigation
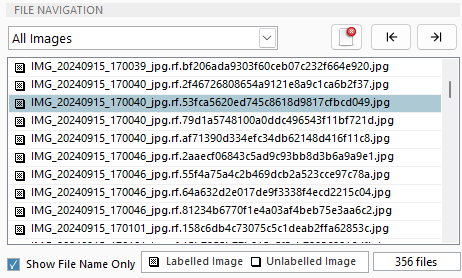
The file navigation option allows you to
- Navigate through each image and deleting them if necessary
- Search for file name or filter by label classes with the drop-down function